Search This Blog

Monday, 27 December 2010

Shoe customising

After a recent context tutorial at Uni, I had the idea of customising shoes and possibly making an online business from this. This also reminded me of my best college project where I decorated cardboard shoes with dried flowers (http://rosieprestoncraft.blogspot.com/2010/07/past-projects.html). The only problem I had with these shoes was that they were not able to be worn.

Before I could think about making a business, I needed to practice! I was originally going to use my own old high heels, however on a recent trip to Primark I found a pair of black suede effect heels for just £2! Even the lady on the till had to double check it was correct! I then made a trip to small habedashery on Farsley town street where I picked up some fringing, beading and ribbon.


I wanted to use cream as I thought it would look really sophisticated against the black alongside the layering of the embellishments. I used simple running stitch to attach the fringing and beading together and then used strong glue to layer the ribbon on top.


This was then strongly glued around the inside edge of the shoe so it hung and sparkled!


I am hoping to sell these for around £15 due to the low cost of materials and to gain some feedback.

As always, comments full appreciated.

Enjoy!

Tuesday, 16 November 2010

Rug Tufting

All presented work had to be left in our work spaces for a week which meant that we were unable to work at our desks until the following week. I therfore felt very smug about having booked myself in to use a rug tufting frame. I had previously learnt rug tufting in my first year and created a small doormat sized rug. Therefore this year I hoped to create a larger piece. I worked directly from my images of burns. My first rug only used a quarter of the frame space. In this design I used up to three colours at a time throught the nozzle. This created a speckled effect which worked well with my imagery and the blending of colours.


For my next rug I used a long thin strip from a grayscale photocopy. This rug was significantly larger. I tried to match my colours to those in the photocopy, however I struggled to find the exact colours within the supply uni has. I found that the dark grey had a hint of khaki, the palest grey had a hint of cream and there was no bleached white which led to me using silk. Silk was really awkward to use. It kept slipping through the nozzle and entwining itself around the blade. It was also quite a strong yarn and did not cut cleanly. I persevered with the silk as once tufted it gave a lovely irridescent and soft finish... even if there was a hint of pink within there...


Photograph taken from the top


Photograph taken from the bottom


Here my rug is modelled by my friend Emily! I took this photograph to allow a feeling of size.


 As always, all comments appreciated.

Assessment week

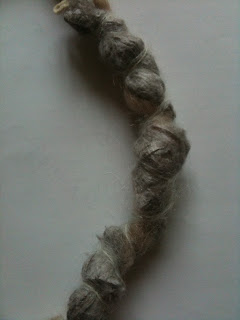
Over the past few weeks I have been slaving away over my new uni project. Over the summer we were asked to create a book of drawings - a 5 minute drawing every day until we returned to uni. In my book I had drawn a lot of people. I had drawn family, work colleagues, and models in magazines. The drawing I was most inspired to develop was a coloured sketch of a half melted candle. Combining these two components in a group tutorial led to a discussion into burns on skin. I was unsure on how to approach this topic as I am quite squeamish and was unsure on where I would be able to stomach any visuals. I eventually braved the library medical section and photocopied images from some books specific to burn injuries. I also enlarged these images by a considerable amount so that they focused on skin surface and not the victims in pain. At first I felt very uncomfortable using these images but after some time I became anaethetised to them and saw them purely as surface pattern. I used my previous ecru work and these images to develop braids that reflected the bulbus and bubbled surfaces of te skin. My assessment area at half way is shown below. I was very proud of my time management skills and had my work presented three days early!


All feedback is appreciated!
  

Halloween Pumpkin

In true halloween spirit I carved out a pumpkin! I found this design on the internet and I think it was originally taken from the animation "the nightmare before christmas". It took me around an hour to carve the whole design and make the edges neat but I am very pleased with the finished product and recieved many compliments from the Trick or Treater's parents.

Who knew Dads were so useful?

Take a nosey at what my Dad brought home from Homesense... he knows me well!

Blackpool sunset

A few weeks ago I went on a family weekend away to Blackpool. Whilst there I actually managed to take some rather beautiful photographs which I feel contrast against the more commonly portrayed image of Blackpool being tacky.


Friday, 1 October 2010

Braiding My Own Ecru Yarns

After I had explored ecru as a colour palette I began thinking about how I can apply this to weave. I decided to use my yarns from Texere to create braids. I wanted to vary the thickness, colour and surface as much as possible. My photographs are below.


The yarns used in these samples are

  • Chemille in vanilla and mink
  • Combed and undyed wool ends
  • Combed and brown dyed wool ends
  • Combination of mohair, wool and nylon
  • Silk noil fibres in silver
  • Viscose ribbon in oyster

Thanks for looking!

Ecru Embroidery Samples

After I created the ecru card wraps I began thinking about using other materials and techniques in the same colour palette. I decided to work in stripes as to mimic the stripes in the card wraps. This also meant I could still focus on colour choice and the materials texture rather than composition. My photographs are below.


This sample uses a running stitch, cross stitch and a couching technique with ribbon. I like how the ribbon catches the light creating a focal point against the matte background. 


This sample was created using white material and white thread only. It is interesting to see how tone and texture affect the sample by using different materials. It is also interesting to look at the zig zag machine stitch and how the width and spaces can create tone too.


This sample was created using many handstitch techniques including couching, backstitch, cross stitch and pleating techniques. I feel this sample has quite a sandy or beachy feel due to the colours and material textures. All the materials have a matte finish and are also quite grainy which links itself to sand.


This sample is all machine stitched. I feel this sample is the weakest as the stitch is limited to what the machine can perform. I also think the colours are a little mis-matched and the yellow stripe down the centre becomes too much of a focal point drawing attention from the other subtle colours.


This is my favourite sample and is entirely hand stitched using techniques such as couching, satin stitch, cross stitch, back stitch and chain stitch. I took the most time over this sample and feel that the quality of colour choice and stitch are higher than previous samples. I also like how the materials vary in texture and the stitch creates detail.


More to follow...