Towards the end of my year at university I visited a mill shop called Texere Yarns. The shop sells every yarn you can think of as well as basic tools such as crochet hooks and material specific books. Whilst I was there I picked up a sample of muted yellow leather for five pounds. I decided I would attempt to handmake a handbag. I decided on a pouch shape with a short handle and began preparing for the process by creating a paper template and maquette.
After creating a successful paper maquette I cut out my pattern in the leather and began sewing the base and body together. I had to make sure I made my pattern correctly so that I had enough material to fold in some darts.
My next task was to sew the handle together. The handle was created using a long strip of leather where I folded both sides into the middle then all in half to create a seamless edge. This meant that the handle was now four times thicker than before folded... and the sewing machine didn't like it! I struggled to get the machine going with the pedal and therefore resorted to using the wheel on the right and turning it by hand so I had more control. I also had problems with my thread breaking and puckering due to the leathers' thickness. I was relieved when I finally completed the handle and took it off the machine however I noticed that the sewing machine had created some damage where the teeth had been pushing it through. I also noticed there was a curve to the entire length where the stitching had stretched the leather.
After the tedious task of sewing the handle I started thinking about how I was going to sew the drawstring. I have decided that the same technique of folding should be applied but with strong glue instead of stitching.
I next began thinking about my base. I was worried that once items were placed in the bag it would distort the shape and pull downwards. I didn't want to put a solid base in as this would stray away from the slouchy quality of the pouch. Instead I decided to use simple cardboard and softened it by crumpling it.
Now I had a successful base, I began thinking about the interior. I wanted to use a lining fabric, but it had to both look nice and be suitable in the sense that items would not catch or snag on it. I chose this cream fabric as it is designed for lining but has a nice smooth and slightly shiny finish.
And that's as far as I've got! I will post more photos as I complete it. Any comments appreciated!
Hi I'm Rosie and I have a passion for shoes, fashion, origami, and craft in general! I am currently studying at The University of Huddersfield taking a BA Hons in Textile Crafts. My area of specialism is weaving however I love all forms of hands-on making and crafting!
Search This Blog
Thursday, 5 August 2010
Paper Star
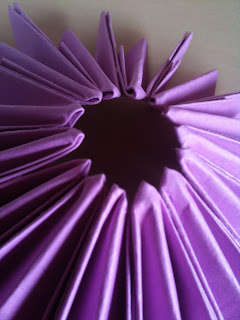
Here's a little project I completed this morning. I cut up an A4 piece of paper into eight equal rectangle and began eperimenting with how I could fold then tesselate the shapes. I achieved the design below.
I'm a little stuck as to what this shape could be used for. I thought it would look quite good as a lampshade but I feel there are other uses too. I tried out my lampshade idea in my room as I have a light which uses LED's and has plastic stars over the top. I removed one of the stars and put my design in its place. I do have one worry about the material being paper as I found the LED's were very hot when I caught the side of my thumb on the bulb! Any suggestions would be greatly appreciated.
I'm a little stuck as to what this shape could be used for. I thought it would look quite good as a lampshade but I feel there are other uses too. I tried out my lampshade idea in my room as I have a light which uses LED's and has plastic stars over the top. I removed one of the stars and put my design in its place. I do have one worry about the material being paper as I found the LED's were very hot when I caught the side of my thumb on the bulb! Any suggestions would be greatly appreciated.
Monday, 2 August 2010
Pot Pourri experiment
Expanding from my last post, I purchased some tracing paper today. I was hoping it would be more transparent, therefore enabling me to create a sphere that once filled with pot pourri, would show colours through the surface. This may have been possible if the tracing paper had not been folded into pyramids, as once folded it increased in thickness and opacity. I decided to document the making process in progresive photographs. These can be seen below.
Thanks for looking!
Thanks for looking!
Subscribe to:
Comments (Atom)


